Showing posts with label Computer tricks. Show all posts

Monday, December 12, 2016

How To Find Who Logged Into Your Computer And When In 7 Steps Easy


Have you ever wanted to monitor who’s logging into your computer and when? On Professional editions of Windows, you can enable logon auditing to have Windows track which user accounts log in and when.

Step 1. First of all, type “gpedit.msc” in the start menu and hit enter.

Step 2. Now browse to the following folder: Local Computer Policy –> Computer Configuration –> Windows Settings –> Security Settings –> Local Policies –> Audit Policy.

Step 3. Now you need to double click on Audit Logon event and then check “Success” and “Failure” and click on OK.

Step 4. Now you need to type “Event Viewer” on the start menu and hit enter.

Step 5. Now navigate to: Windows logs –> Security.

Step 6. Now you need to look for the events with event ID 4624 (4624 represent successful login events)

Step 7. You can double click on the events to know the time and some extra details about the login.

That’s it! you are done.
 This is the easiest way to track all the login attempts in your Windows computer.
  feel free to comment in the section below.

Friday, December 9, 2016

How To Stop Windows 10 From Installing Update Automatically on your PC


As a general rule, an up-to-date operating system is a secure operating system, and some people are terrible at updating their operating systems.

If your main issue with Windows 10's automatic updates is the fact that your PC restarts at inopportune times, you're in luck: Windows 10 allows you to schedule restarts for a specific time. When a new update has been downloaded and installed, Windows 10 will prompt you to schedule a time for your PC to restart.

The easiest way to prevent Windows 10 from automatically downloading updates is to use a metered Internet connection -- one of the features of limiting your data is that Windows 10 won't force-download OS updates. Some networks, such as cell networks, are metered by default, but you can also meter your Wi-Fi network by going to Settings > Network & Internet > Wi-Fi > Advanced options and turning Set metered connection on.

You can't meter your Ethernet connection through the Settings menu -- Microsoft assumes your Ethernet connection allows you unlimited data, apparently. The only way to set your Ethernet connection to metered is to perform a registry edit -- it's a little complicated, but here's how to do it.

You can still download updates on a metered connection, you'll just have to do it manually by going to Settings > Windows Update > Download.
Disable automatic driver updates

While you can't really stop Windows 10 from automatically updating the OS, you can stop it from automatically updating your device drivers. To do this, right-click the Start button and click Control Panel.

STEPS

In the Control Panel, go to System and click Advanced system settings to open the System Properties window.


Open the Hardware tab and click Device Installation Settings.


When prompted with this message, click No and click Save Changes.

Saturday, July 26, 2014

Technique To Run Program In A Faster way !!!


                   How To Create Keyboard Shortcut key to Run The program


In this post I am going to show you how to make your own shortcut key to run the program in faster way. Using this technique your speed will increase and you can make your own keyboard shortcut Just follow the simple steps. 1. go to start and right click on the program which you want to create a shortcut key
2. go to properties (see the bellow snapshot)
create your own shortcut

3. Now Click on shortcut key and just press ctrl and press any key ( from a to z ).
create your own shortcut 2
And hit ok and you have done !!!

Enjoy The visit!!


Simple Trick to Secure Your USB flash Drive From VIRUS by convert it to NTFS

Simple Trick to Secure Your USB flash Drive From VIRUS by  convert it to NTFS


In this post, we will discuss the solutions to tackle two situations:
  • prevent your USB drive from getting infected.
  • protect your system from USB drive virus attack
There are plenty of solution to safeguard the USB drive, but most of them are computer specific. The method described here should work across different Windows computers.
The following method uses the security permission of NTFS file format to secure your USB drive.
Note: The default filesystem for most USB drive is Fat32, which is good if you are using the it on different platforms such as Linux, Mac OS and Windows. If you are using it primarily on Windows, you can safely convert the file system to NTFS.
Note: You should not convert the USB drive to NTFS if it is less than 2GB in size as the performance of the USB drive may get affected.
To convert a USB drive to NTFS file system, follow the steps below:
1. Insert the USB drive and then go to Device Manager.
2. Under Disk Drives, right click the USB drive name and select “Properties”.

usbdrive-device-manager
3. Go to Policies tab and select “Better performance” under Removal policy.
usbdrive-better-performance
4. Now go to Computer, right click the USB drive and select Format.
usbdrive-usb-format
5. Make sure NTFS is selected from the File System drop down menu.
usbdrive-usb-format-ntfs
6. Click “Start” to format the USB using NTFS file system.
Now that we have formatted our USB drive using NTFS file system, the next step is to configure the security permissions such that the root of the USB drive remains read-only.
1. Go to Computer, right click the USB drive and select Properties.
usbdrive-usb-properties
2. Go to the Security tab and make sure “Everyone” has read-only rights on the root folder.
usbdrive-usb-security-permissions
3. Lastly, create a folder called “Write” and give it permissions for read/write. Now whenever you insert your USB drive, any virus on the PC won’t be able to write to the root of the USB drive. For you, you can save your data to the “Write” folder.
To effectively prevent the virus in the USB drive from attacking the computer, the best way is to disable the “autorun” feature so virus don’t get activated in the first place. (The virus usually hide itself in the “autorun.inf” file in the USB drive so that it is activated the moment you inserted your USB drive.)

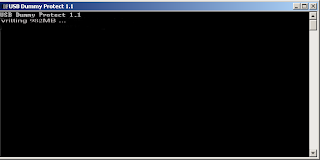
Download USB Protector and be safe on virus infected computers.  It’s not an antivirus, but it protects the usb drive by writing a dummy file which takes all space and leaves no free memory for virus to write into it.

Key Feature:

    This utility makes sure that no virus enters your pen drive without your permission.

How to use USB protector:

  • Copy the software into your USB drive.
  • Execute the file from USB in a virus free environment. [for eg, your PC.]
  • It will create dummy files and takes all free space in your drive.
  • Put the usb drive in any virus infected PC’s and your drive will not be nfected.
     
    Click Here to Download USB protector [Size 4.1KB]
     Please feel free to ask in the comment section below.
 

Contact Form

Name

Email *

Message *

Advertise